Using Plexiglas™ with Glassprimer™ glass paint

Using Plexiglas™ with Glassprimer™ glass paint

Using Plexiglas™ with Glassprimer™ glass paint

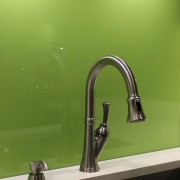
Backpainted Plexiglas™

In the last post, we looked at backpainted glass. Glass is an exceptional surface material because it is easy to clean, unstainable and highly durable. But glass isn’t always ideal. Its weight sometimes makes it a less attractive choice for surface decoration. Enter Plexiglas™.

Plexiglass™ as a glass substitute

In some cases, Plexiglas™’s lightweight, transparent composition makes it a better choice for surfacing or resurfacing. As an example, you may want to add glass fronts to your kitchen cabinets, but the weight of the glass would make that difficult. You can laminate existing cabinet fronts with Plexiglas&153;, and you can backpaint it with Glassprimer™ glass paint.

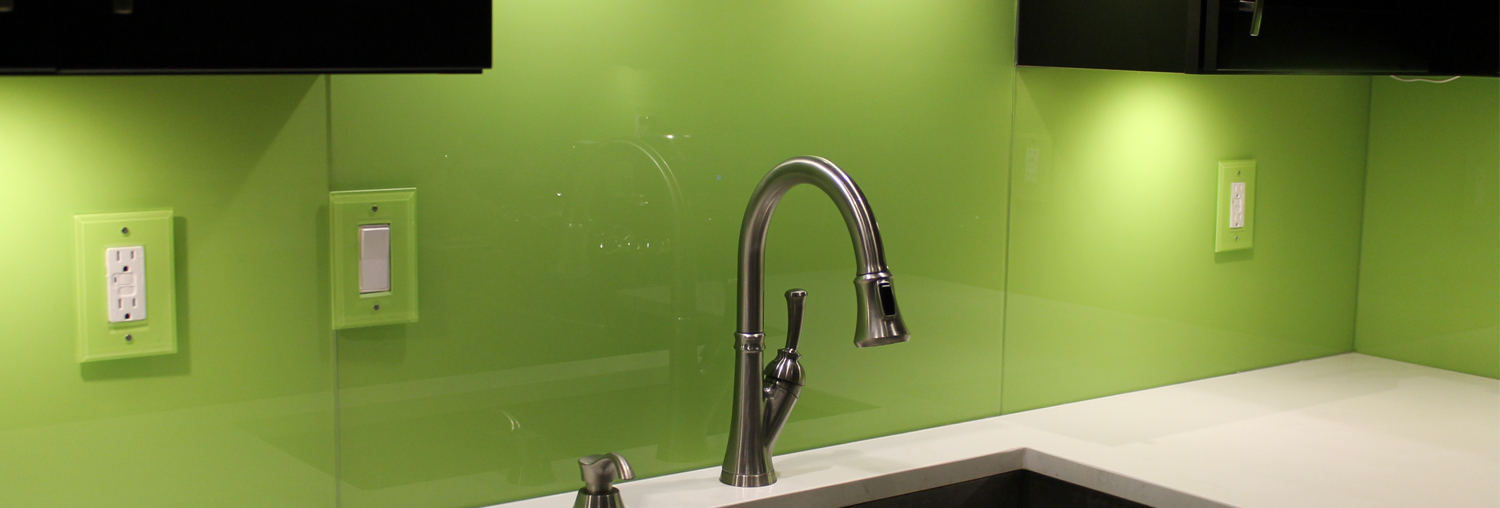
It’s hard to argue with Plexiglas™ as a material choice. It is inexpensive and readily available. You can cut Plexiglas™ into any shape, and its weight is only a fraction of comparably sized glass. Unlike tempered glass, you can cut Plexiglas, which means you don’t have to move electrical outlets.

One advantage that glass maintains over Plexiglas™ is the heat resistance of tempered glass. Plexiglas™ is not heat resistant and is not suitable for use around the stove. If you want a backpainted backsplash near the stove, glass is still your go-to material choice.

If you intend to create a backpainted Plexiglas™ surface, you can measure and precut the material before you paint it. Precutting the surface allows you to avoid damaging the paint after it’s been applied to the Plexiglas™.

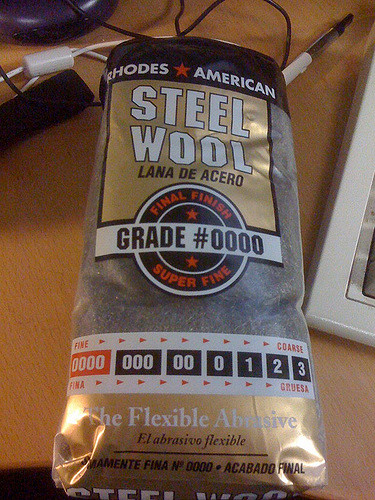
The surface preparation for Plexiglas™ is no different than the surface preparation for glass. To prepare the surface for painting, washing it with alcohol and fine steel wool. Dry the surface with ordinary paper towels and apply the Glassprimer™ glass paint using your preferred application method. Plexiglas™ can develop and hold a static charge. This isn’t dangerous, but it is attractive to dust, lint and hair.

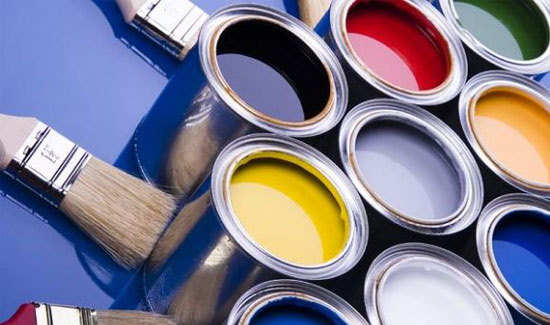
The steel wool you use to clean the Plexiglas™ will lightly scuff the surface, improving the adhesion of the Glassprimer™ glass paint. As with glass, use thin coats to cover the Plexiglas™. The thinner the coat, the better the final results will be. Thin coats of paint also help you avoid drips. Wait until each coat is dry before applying another coat. You can apply as many coats as you like, but the best results are often achieved with 3-8 coats of Glassprimer™ glass paint.

You can also mount your finished project with neutral-cure silicone adhesive. You can also use mastic, but silicone adhesive is lightweight and very easy to work with.
If you’d like some inspiration for your glass paint project, please visit the rest of our site. If you’d like to purchase Glassprimer™ glass paint, please visit our online store .

Photo Credit: Pedro Ribiero Simoes, via Flickr.com

How to create a backpainted glass backsplash

How to create a backpainted glass backsplash

How to create a backpainted glass backsplash

How to create a backpainted glass backsplash

Glass can add a classic, luxurious look to any room. In the kitchen, glass is among the most practical of surfaces. It stands up to both food and household cleaners, won’t stain, doesn’t retain bacteria and looks great year after year. One way to decorate glass is using a technique called backpainting. Using Glassprimer™ glass paint, you can apply paint permanently to glass, in virtually any color. Because the paint is applied to the back side of the glass, it won’t fade, peel or chip, even in high humidity and direct sunlight.

Creating backpainted glass

Tempered glass is a must, if you intend to put backpainted glass near the stove. The rapid temperature changes in a kitchen make ordinary plate glass unsuitable for behind-the-stove applications. Tempered glass is specially treated to help resist impacts and significant changes in temperature. You can purchase tempered glass in custom or standard sizes from a glass shop.

To make a backpainted glass backsplash, paint one side of the glass using the paint color of your choice. Ordinary paints simply won’t work because they cannot bond to the glass. While ordinary paint may dry, it does not stay on the glass, and cannot resist humidity. Using ordinary paint on glass won’t produce a very satisfying result!

Once the Glassprimer™ glass paint has dried and cured, you can mount the backpainted glass in place using mastic or neutral-cure silicone caulk. The adhesive will not be visible through the paint, so your results will be outstanding!

Glass paint is specially formulated to make a permanent bond with the nanosurface of the glass. This permanent bond allows the paint to stand up to humidity, which is handy in the kitchen. In addition to creating a permanent bond with the glass, the paint resist peeling, fading and cracking. That’s essential in the kitchen keep food safe.

No kitchen counter area would be complete without electrical outlets, and you might have noticed that you can’t cut tempered glass. So how do you work around the electrical outlets? The easiest way to manage the electrical outlets is to move them. If you’ve never worked with electricity, consult with an electrician, who can safely move your appliance outlets prior to your backsplash installation.

Angled power strips are exceptionally versatile, especially in areas like the kitchen. They can be installed under countertops or cabinets, and may actually increase the number of outlets in your kitchen. They can also be installed discreetly, giving a clean look to your kitchen counters.

If you’d like some inspiration for your glass paint project, please visit the rest of our site. If you’d like to purchase Glassprimer™ glass paint, please visit our online store .

How to remove glass paint

How to remove glass paint

How to remove glass paint

When you’re painting, it’s very common to get a little overspray, or drip a bit of paint in a place you didn’t intend to. One question we get often is, “How do you remove glass paint?” Glass paint is designed to make a permanent bond with glass, so if you’re going to remove glass paint, you’ll need to remove it as soon as possible after applying it!

You can remove glass paint – for a short time!

The key is to remove glass paint before it bonds to the glass. Glassprimer™ glass paint is designed to cure within 24-72 hours of application. The permanent bond with the glass surface will occur within about two weeks of application. Once the permanent bond has formed, it’s generally not possible to remove Glassprimer™ glass paint.

It helps to understand a little bit about what happens when and how paint dries. Paint formulas include solvents, which allow the paint to spread easily. The solvents are designed to evaporate, leaving behind the color and binder.

How paint dries depends upon a number of factors, including how many coats of paint were applied, how thick each coat is and the relative humidity in the workspace. These factors can also determine how successful you’ll be if you need to remove paint. Thicker coats take longer to dry because more solvents need to evaporate. If you’re painting in “dry” air (less than 50% humidity), your paint will dry faster. The dryer your workspace is, the faster the paint will dry. Likewise, if you’re painting in space that has high humidity, your paint will dry more slowly.

Paint also hardens as it dries. “Hardening” means that the paint achieves a “solid” shell-like state that resists damage. When the paint is both “dry” and “hard”, it is “cured.” A paint can be dry to the touch without having hardened, but it cannot harden without drying.

The Glassprimer™ glass paint formula also includes a catalyst which allows the paint to cure rapidly – within 72 hours of application. Without the catalyst, it would take the paint as much as a year to cure! All of this points to one thing: you need to work quickly to remove glass paint after it’s been applied!

For accidental drips, your best bet is to wipe them up right away – before the paint has even dried. Use acetone or a standard paint stripper to catch any “accidental coverage.” Sometimes, it’s better to wait until the paint has dried to the touch before you attempt to handle the workpiece. Glassprimer™ glass paint can dry to the touch in about 2 hours or less, but you’ll need to give your project a few hours before you attempt to handle it. This will help you avoid damaging the paint you don’t want to remove.

Before the paint has cured, you can remove it with acetone. If you accidentally remove more paint than you intended, no worries. You can reprepare the surface and reapply Glassprimer™ glass paint. Your newly applied paint will blend expertly with the paint that remains on the surface.

For large scale removals, lay the workpiece paint-side up on a flat surface, or on the ground. Apply a standard paint stripper to the work and let the paint stripper soak into the paint. Once the stripper softens the paint, you can remove it easily with a scraper, a hose or a pressure washer. When you’re ready to repaint, re-prepare the surface, as you the first time you painted it, using alcohol and steel wool.

For stubborn spots, you can repeat the stripping and cleaning process. Once the paint has been softened, you can also use a single-edged razor blade to remove stubborn spots.

If you’re trying to work with paint that has already permanently bonded with glass, you may want to consider replacement, rather than trying to recondition the glass. If you’d like more information about removing glass paint, please visit us at glasspaint.com.

Photo Credit: , via Flickr.com

Glass paint cleaning tips

Glass paint cleaning tips

Glass paint cleaning tips

No painting project is complete until it’s cleaned up, and the same is true for a glass paint project. Cleaning up your glass paint project is easy, as long as you have the right materials on hand. Paint is solvent-based, and as the solvent dissipates, the paint dries and cures. Therefore, the quicker you act on your clean up, the cleaner your painting tools will be!

How to clean glass paint from your painting tools


Solvents are essential to clean up glass paint, but they can be dangerous to your health. Protective clothing is essential, as are protective coverings for your hands and eyes. Work in a ventilated area, because solvent gasses can “pool,” making it difficult to breathe and potentially creating other hazards. Some solvents are flammable, or explosive, so keeping their fumes away from ignition source and well diluted with fresh air is a must!

Cleaning a HVLP paint sprayer is essential to its continued use. HPLV sprayers have some small pieces that can get clogged with paint easily, so a quick cleanup of the parts is in order. Paint dries quickly, so empty any remaining paint from the sprayer and break it down immediately after use. Once the parts are separated, use acetone to clean the individual sprayer parts. Acetone will eliminate dried and drying paint on your sprayer components. You can use an acetone-soaked cloth or brush to clear out the body of the sprayer.

For the smaller parts, run a stream of acetone through the sprayer parts for about 30-60 seconds. You can also soak HPLV parts in acetone, or use small brushes or pipe cleaners to clean nozzles and other small parts. Rinse the cleaned parts to remove any remaining acetone and set them aside to dry.

Acetone will also clean paint brushes, so if you’ve applied Glassprimer™ glass paint with brushes, dip the brush end into acetone and allow it to soften and dissolve paint. Acetone is very harsh, so use high quality, natural fiber brushes. Don’t dip the brush tip more than half—way into the paint. This will help you avoid getting paint into the base of the brush. You could also “prime” the brush with acetone by dipping it all the way into acetone and letting the brush dry before using it.

Acetone will soften and in some cases, dissolve, plastic. Do not use acetone to recover inexpensive plastic brushes. If you’ve used inexpensive brushes, your best bet is to cover them in foil or plastic food wrap and dispose of them.

If you’ve chosen to use good quality, mohair rollers with a solvent-resistant core, you can use acetone to clean the roller nap once you’ve finished your glass paint project. Inexpensive rollers tend to have plastic cores, which – like plastic paint brushes – won’t fare well in acetone. If you’ve used inexpensive, plastic core rollers, you may want to wrap them carefully and discard them instead of trying to clean them. (A melty plastic roller can make a big mess!)

If you’d like more information about working with glass paint, please visit the rest of our site. If you’re ready to purchase Glassprimer™ glass paint, please visit our online store at glasspaint.com.

Photo Credit: farrahsanjari, via Flickr.com

Get professional results from glass paint

Getting professional results from glass paint

Getting professional results from glass paint

Most people don’t paint for a living, and they worry about making mistakes with premium paints. The good news is that Glassprimer™ glass paint is easy to work with, and even rookie painters can get professional results from glass paint. Consider these tips if you’re looking to get professional results from glass paint projects on your home-improvement list.

How to get professional results with glass paint


There’s an old saying about using the right tool for the job, and nothing is truer when working with glass paint. Getting professional results from glass paint depends upon using the right tools for this job.

High-volume, low pressure sprayer


A high-volume, low-pressure (HVLP) paint sprayer applies paint evenly and quickly to any surface. It’s especially good for working with glass paint, but you can also use an HPLV sprayer with any paint. This is a tool you’ll get a lot of use from, no matter what surface you’re painting, or what paint you’re using. Aside from producing professional results with glass paint, they also reduce the amount of paint you use per coat by as much as 40%. Reducing the amount of paint also means improving the drying time between coats. Not only do you save money, you also save time. An HVLP paint sprayer is a great investment for the do-it-yourselfer, and if you paint regularly, you’ll get a lot of use from this particular tool.

HVLP paint sprayers can also be used to apply other coatings, like stain, lacquer and varnish. Hardware and home improvement stores carry HPLV paint sprayers, so they’re easy to find. One word of caution – keep your paint sprayer clean for trouble-free operation!

Paint rollers


You can also apply glass paint with a paint roller. Provided you choose the right kind, you can also achieve professional results from glass paint. Because you use solvent to clean glass paint from your tools, you’ll want a paint roller that’s solvent-resistant. Mohair rollers provide the best overall coverage and are solvent resistant. If you’re planning to paint with a roller, be sure the roller core is also solvent resistant. Also pay attention to the thickness of the nap when you’re selecting a roller. The thicker the nap, the more paint it will absorb. Choose a roller with a thin to moderate nap to avoid collecting too much paint.

Work slowly and don’t oversaturate the roller with paint. You will get highly professional results by applying thin coats of paint. Wait for each coat to dry completely before applying the next coat. Rollers tend to apply thicker coats, so a little patience will go a long way!

Paint brushes


You can get professional results from glass paint using a solvent-resistant mohair paintbrush. As with rollers, the trick to getting professional results from glass paint is applying thin coats of paint. Brushes work best for small area jobs. If you have a lot of surface to cover, consider using a sprayer or roller instead. You can find mohair brushes in the paint section of home improvement and hardware stores. As a word of caution, avoid dipping the brush more than about halfway into your paint tray. Keeping the paint on the tip of the brush will give better control, better results and make it easier to clean up!

If you’d like more information about glass paint, or would like to purchase glass paint online, please visit our online store.

Photo Credit: Jaco Jahluka, via Flickr.com

Preparing glass for a glass paint project

Preparing glass for a glass paint project

Preparing glass for a glass paint project

Preparing glass for a glass paint project is a critical step that will ensure your paint project goes smoothly. Glass paint is easy to work with and easy to clean up. The surface preparation isn’t complicated, but spending a few minutes preparing glass will allow you to get the most out of your glass paint endeavors.

How to prepare the glass surface for paint


Before you start painting, you’ll need to assemble a few common items to help you prepare the glass before painting it. You’ll need latex gloves, paper towels, rubbing alcohol and fine grit (#000 or #0000) steel wool. That’s it!

You can find disposable latex or latex-free gloves in the paint aisle of your favorite hardware store. You can also use the kind of gloves you’d use when cleaning the dishes or doing housework. (You’ll just want something to protect your hands and fingers from the alcohol and the steel wool.)

Don’t use expensive paper towels! The cheap kind is ideally suited for this project. You’ll want to avoid lint-free paper towels. That seems odd, but you’ll get a much better result with the cheapies.

Steel wool comes in a number of grades, but you’ll want fine grit to prepare the surface – the finer the better. If you use a coarser steel wool, you risk putting visible scratches onto the glass surface.
Regular rubbing alcohol can be purchased in the health and beauty section of your local grocery store or pharmacy.

When you have your materials together, you’re ready to start preparing the glass for painting. Put your gloves on and wet the glass surface with the rubbing alcohol. Using the steel wool, remove all dust, dirt and surface contaminants, using a gentle circular motion. Use as much alcohol as needed to remove all of the surface dirt and dust.

Using the paper towels, wipe the surface of the glass until it squeaks. Make sure the entire surface to be painted is “squeaky clean.” Once the glass starts squeaking, don’t handle it with your bare hands. Use only gloved hands to handle the glass, and do your surface preparation immediately before painting.

That’s it! You’re ready to paint with Glassprimer™ glass paint. Once your first coat is applied and dried, you do not need to perform the surface preparation again, but you will want to wait until the top coat is completely dry before applying additional coats of Glassprimer™ glass paint.

Glassprimer™ glass paint dries under ideal humidity conditions in about 2-3 hours, and can be safely handled after about 4 hours. If the humidity is much greater than 50% when you apply the paint, it may take much longer to dry.

If you’d like more information about glass paint, or would like to purchase glass paint online, please visit our online store.

Photo Credit: Tony Buser, via Flickr.com

Glass paint coverage information

Glass paint coverage information

Glass paint coverage information

A gallon of Glassprimer™ glass paint can provide adequate coverage for as much as 265 square feet of surface. The amount of paint you need depends upon the number of coats you apply and how much surface you need to cover. We recommend applying between 3 and 8 coats of Glassprimer™ glass paint to glass for backpainted applications. This level of coverage will allow you to achieve the color density you’re looking for.

A good way to estimate the cost of your project is by the square foot. Glassprimer™ glass paint is sold by the gallon, and costs about $1.00 per square foot.

How much glass paint do I need?


If you intend to create a backpainted glass backsplash along a counter wall in your kitchen, you can estimate the amount of paint your project requires by starting with the area of the surface to be covered. If your backsplash needs to cover a 12-foot run of counter space, and the distance between the splash block and the bottom of the cupboards is 2.5 feet, you have a total of 30 square feet of working area to cover.

Use a high-volume, low-pressure sprayer to achieve the coverage you’re looking for. Apply the paint as thinly as possible, and use multiple coats to achieve the desired final appearance. Allow each coat to dry completely before adding the next coat. By varying the thickness of each coat, you can create opaque or translucent effects. You can also purchase Glassprimer™ glass paint that’s formulated to create a frosted effect.

Glassprimer™ glass paint can be tinted to match the paint palette of any major paint manufacturer. This allows you to match existing colors or create the perfect color palette for your room, while using different types of paint.

When you purchase a gallon of Glassprimer™ glass paint, you also received the catalyst – a necessary component when using Glassprimer™ glass paint. The catalyst is packaged separately, so you can mix only the exact amounts of paint and catalyst you need to complete your project. This also allows you to store the unused paint for another project. Glassprimer™ catalyst, dries and cures completely in 24-72 hours, creating a permanent bond with the glass.

If you’d like more information about glass paint, or would like to purchase glass paint online, please visit our online store.

Photo Credit: Scott Lewis, via Flickr.com

Backpainted glass on furniture

Backpainted glass on furniture

Backpainted glass on furniture

Glass is a very durable, versatile protective surface that works just as well on furniture as it does on walls. When you think about backpainted glass, you naturally think about backsplashes, but you can make a variety of improvements to furniture using custom cut, backpainted glass.

Place backpainted glass on just about any furniture surface to update the appearance of your piece. Try this on any table or desk that’s in good structural condition, but has a worn or damaged top.

Glass topped dining room table


Wooden dining table tops are notorious for picking up water damage, heat damage and scratches. Did you find an antique wooden table that you’d love to have in your home, but don’t want to spend the time and effort to refinish the surface? Try this trick instead.
A glass shop can custom-cut and temper a sheet of glass to fit your table. You’ll want to make sure the sheet is heavy enough to resist sliding, changes in temperature, and the occasional dropped dish or glass. Backpaint one side of the glass using your favorite color, or even create a pattern with the paint. When the paint has cured, install the glass on the tabletop. You can secure it with silicone glue, or if the glass is heavy enough, it will sit safely on your table. Clean and sanitize the tabletop using ordinary cleaners and enjoy your table for years to come!

Cover a desk top with glass


Few things are more majestic than a desk with a glass top. Furniture makers rarely make ornate desks anymore, but you can find these old gems in resale and antique shops. The desk is probably still in good shape, but these pieces are often stored improperly and may have a top that has been stained, scratched or even delaminated. Start at the glass shop and have them custom fit a piece of glass to your desk. You can use a sheet of regular glass, but thicker glass will work better in this application. Backpaint the glass top, using a spray applicator. You could also paint with stencils or try a frosted effect. Once the paint has cured, place the backpainted side of the glass on the desk surface and get to work!

Glass topped coffee table


Nothing is more at home than a glass top on a coffee table. You can put your drinks or dishes down on the table without worrying about picking up water rings from glasses, or discolorations from heat. Tempered glass is the best choice for this project. As with the other projects, start with the glass shop and obtain a piece of tempered glass that’s been cut to fit your coffee table. (Tempered glass must be cut before tempering, since you cannot cut tempered glass.) Apply a coat of Glassprimer™ glass paint in your favorite color. The paint will be cured in about 24-72 hours. You can place the glass top directly on the coffee table without attaching it to the surface, but you may want to use a silicone glue or mastic if you have children, pets or just tend to run into the coffee table a lot! A coffee table is small enough that you can redo this project whenever you change the color scheme of your room.

If you’d like more information about glass paint, or would like to purchase glass paint online, please visit our online store at GlassPaint.com.

Photo Credit: Clarence Risher, via FreeImages.com

Why glass is making a comeback

Why glass is making a comeback

Why glass is making a comeback

Some architectural materials never go out of style, and that’s one really good reason to consider decorating with glass in your home. Glass is appealing for a number of reasons. Here are a few of them.

Glass offers many advantages

Glass is environmentally friendly. Glass is a combination of a number of naturally occurring materials. We’ve been making glass for thousands of years, and glass offers one of the most environmentally friendly manufacturing processes around. Not only are the raw materials natural, but also glass is infinitely recyclable. Glass is also inert, which means that it’s safe to use in food preparation areas, and can be easily cleaned and sanitized.

Glass is economical. Because the raw materials used in glass are readily available, it is among the most economical of all building materials. You can purchase glass in a wide range of thicknesses, strengths and colors. You can custom-cut glass to fit any space, and you can have glass tempered to strengthen it for use in the kitchen and bathroom.

Glass is practical. In the kitchen, few surfaces are more practical than glass. Glass can be cleaned and sanitized with a wide range of common household cleaners, and cannot develop surface stains or discolorations. It withstands acids in food, and will not retain bacteria, mold or mildew.

Glass is locally available. Glass is produced in hundreds of facilities around the country. Chances are very good that you live near a glass factory. For you, that means glass is readily available, and you can often support your local economy by purchasing glass.

Glass is easy to decorate. Glass is easy to decorate, thanks to Glassprimer™ glass paint. Our glass paint is specially formulated to bond with the surface of glass, making a permanent bond that won’t chip, fade or peel. It resists damage from ultraviolet light, so it will look great year after year, even when it’s installed in direct sunlight.

If you’d like more information about the advantages of decorating with glass, please visit the rest of our site. If you’d like to purchase Glassprimer™ glass paint, please visit our online store .

Photo Credit: Marja von Bochove , via Flickr.com

Decorating with glass paint

Decorating with glass paint

Decorating with glass paint

Glass is one of the most versatile decorating surfaces available today. While you can find colored glass, an easier way to incorporate “colored” glass into your decorating scheme is to apply glass paint to plate glass. If you’ve never heard of glass paint, it’s paint that’s specially formulated to adhere to glass.

As you might guess, paint doesn’t tend to stick to glass very well. Paint is usually designed to be applied to porous or semi-porous surfaces. Ordinary paint will certainly dry on glass, but it won’t adhere to glass. Glassprimer™ glass paint is different. It forms a permanent bond with the glass surface as it dries and cures, and won’t peel, chip or fade.

Glass paint isn’t just for glass

Glassprimer™was specially formulated to adhere to glass, but you can also use it on a number of other challenging surfaces, like metal, masonry, stone, plastic and wood. You can get exceptional decorating results by applying Glassprimer™ glass paint to Plexiglas°. In addition to getting a virtually infinite color palette, Glassprimer™ glass paint is UV-resistant, which means it will still look great even when it’s exposed to direct sunlight.

Glassprimer™ glass paint is tough enough to hold its own in the most challenging environments in and around your home. You can safely use Glassprimer™ glass paint in the kitchen, where rapid changes in temperature and humidity can really shorten the life of ordinary paint. You can also use it in the bathroom – another area where even the toughest of paints don’t last.

As a decorating surface, glass isn’t just another pretty face. You can use glass behind your countertops and stoves to add a splash of color, and create a surface that’s easy to clean and sanitize. You can also laminate kitchen cabinet fronts with glass or Plexiglas° to give them a great new look and extend their useful lives.

Glassprimer&#153 paint comes in a wide range of opaque, translucent and frosted colors. We can match virtually any color from any major paint manufacturer. Glass can be bonded to walls and other surfaces, using common bonding materials like silicone glue or mirror mastic. No matter what you use, it won’t show through the painted glass, so your project will look great from start to finish!

Visit us at GlassPrimer.com for the latest on glass painting and decorating, or to order Glassprimer™ glass paint online.

Photo Credit: Viktors Kozers , via FreeImages.com